-
Log in to your Microsoft 365 account via the following link:
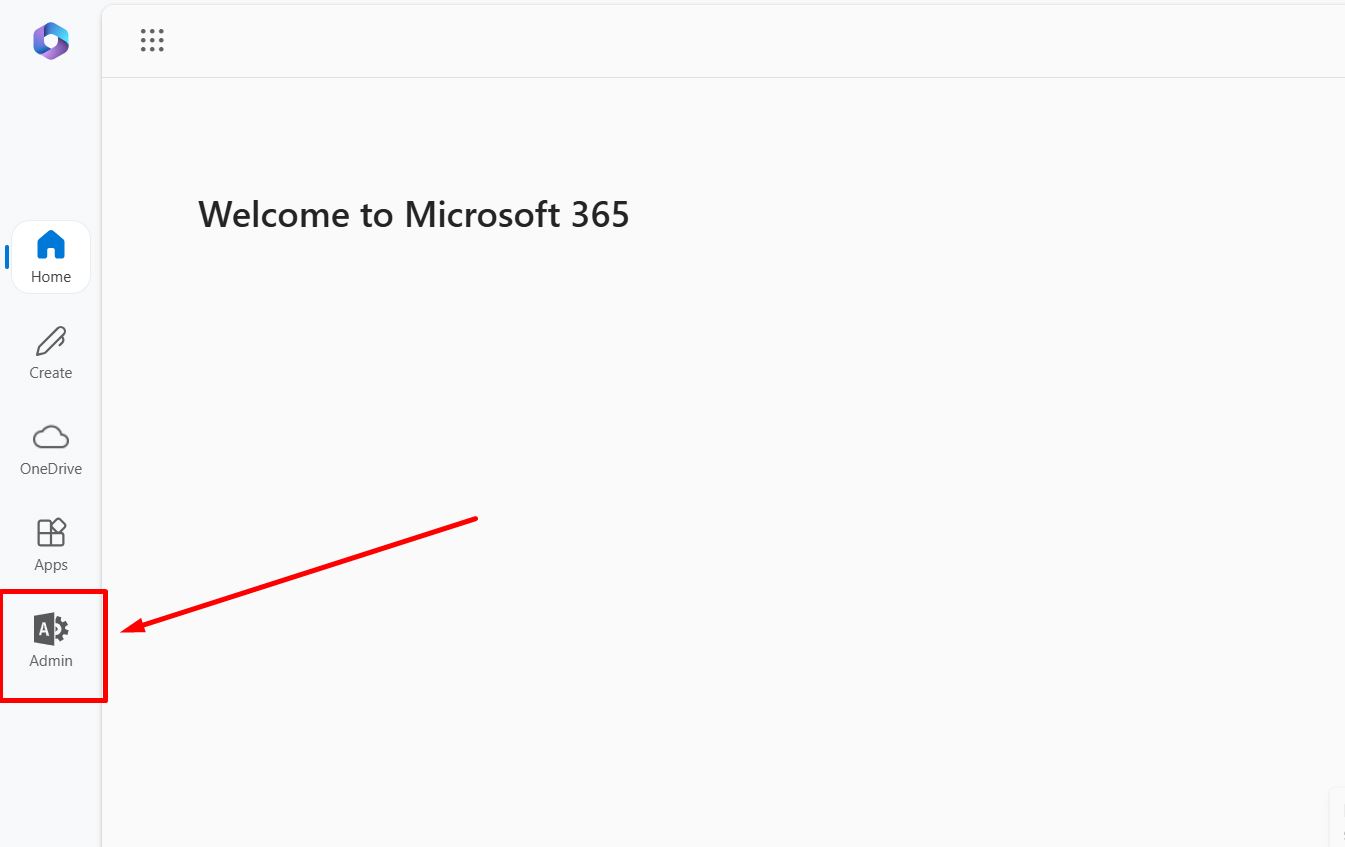
https://www.microsoft365.com/ - After logging in, click on Admin to access the administration dashboard.
3 - From the dashboard, search for Exchange and click on it.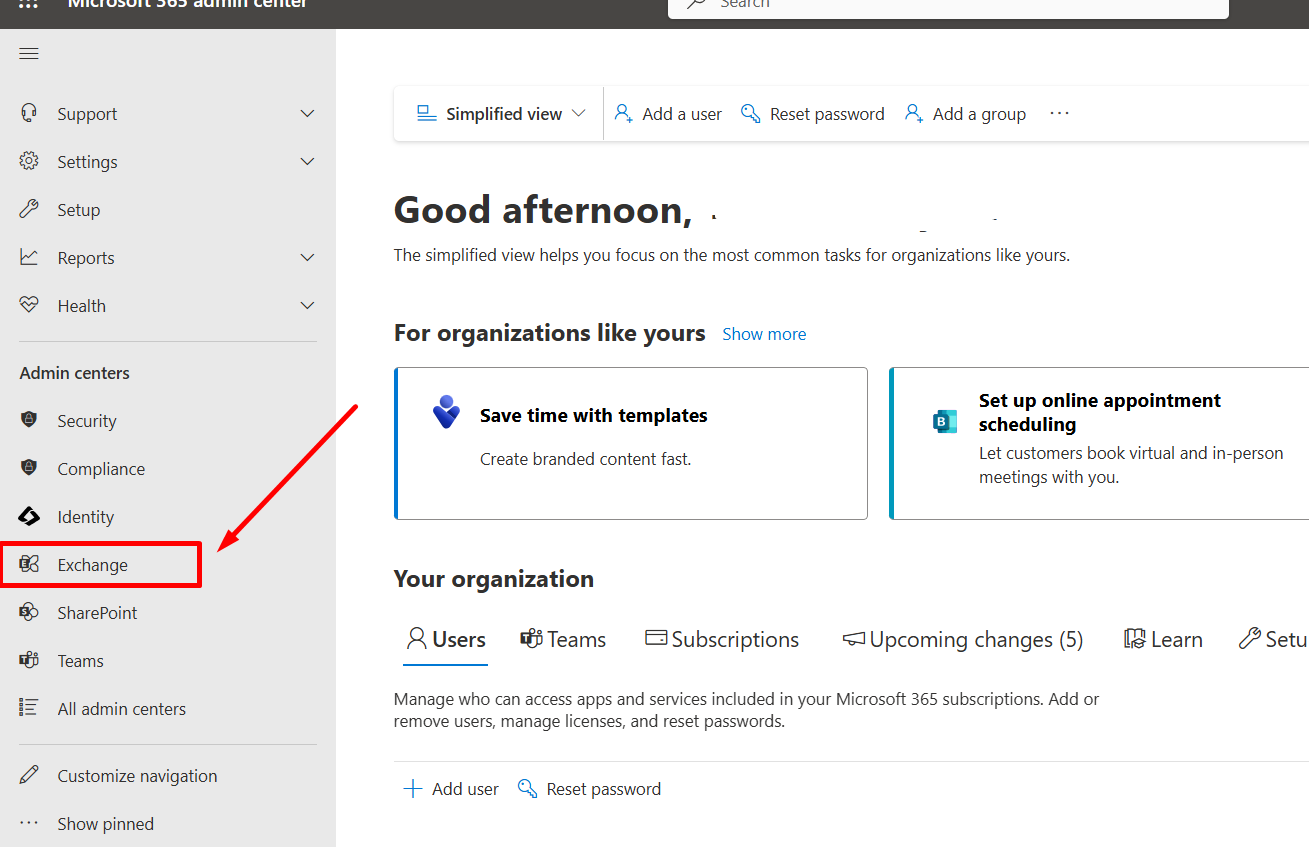
4- Look for the Migration option in the menu and click on it.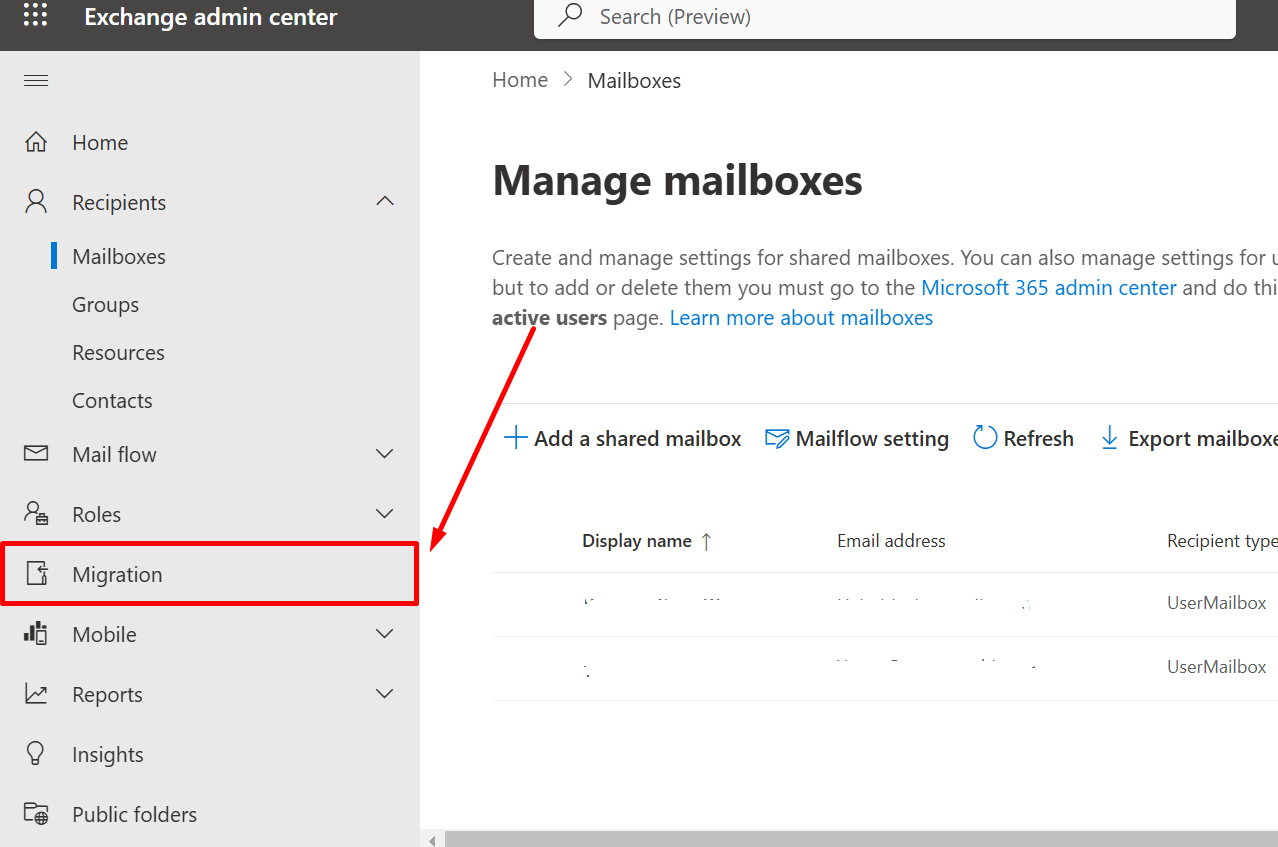
5- Click on Add-Migration Batch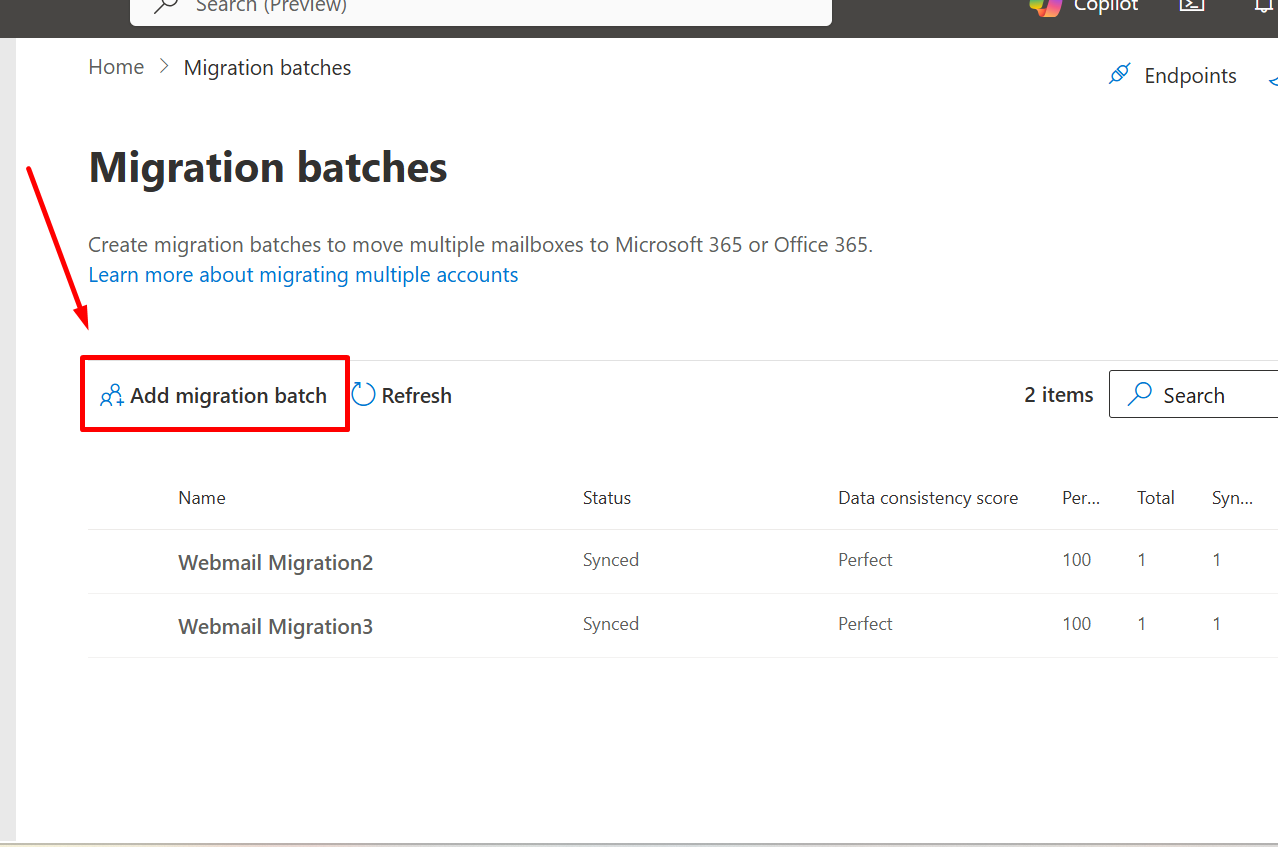
6- Provide a name for the migration batch.
You can use any name you prefer or reference the name shown in the provided image.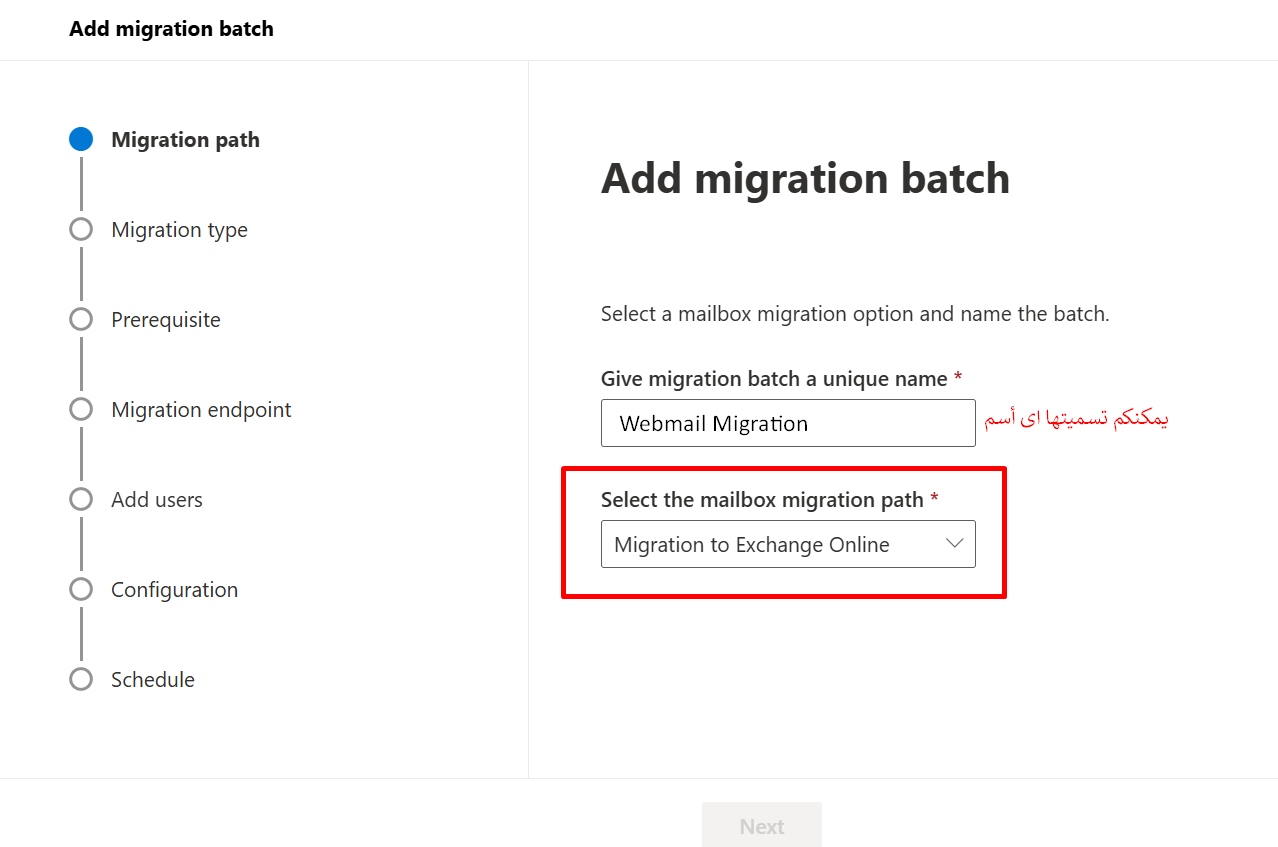
7- Choose the option for IMAP Migration.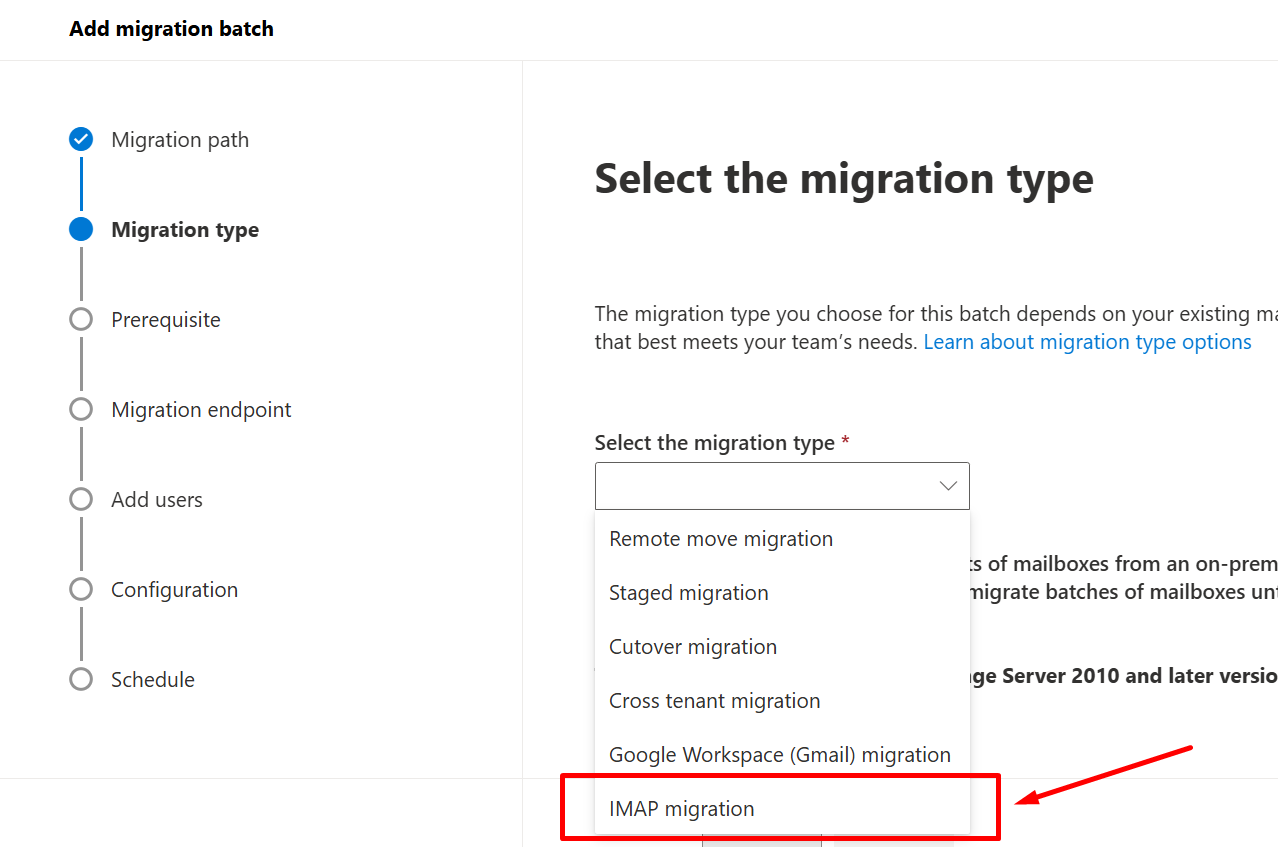
8- Click on Create a new migration endpoint.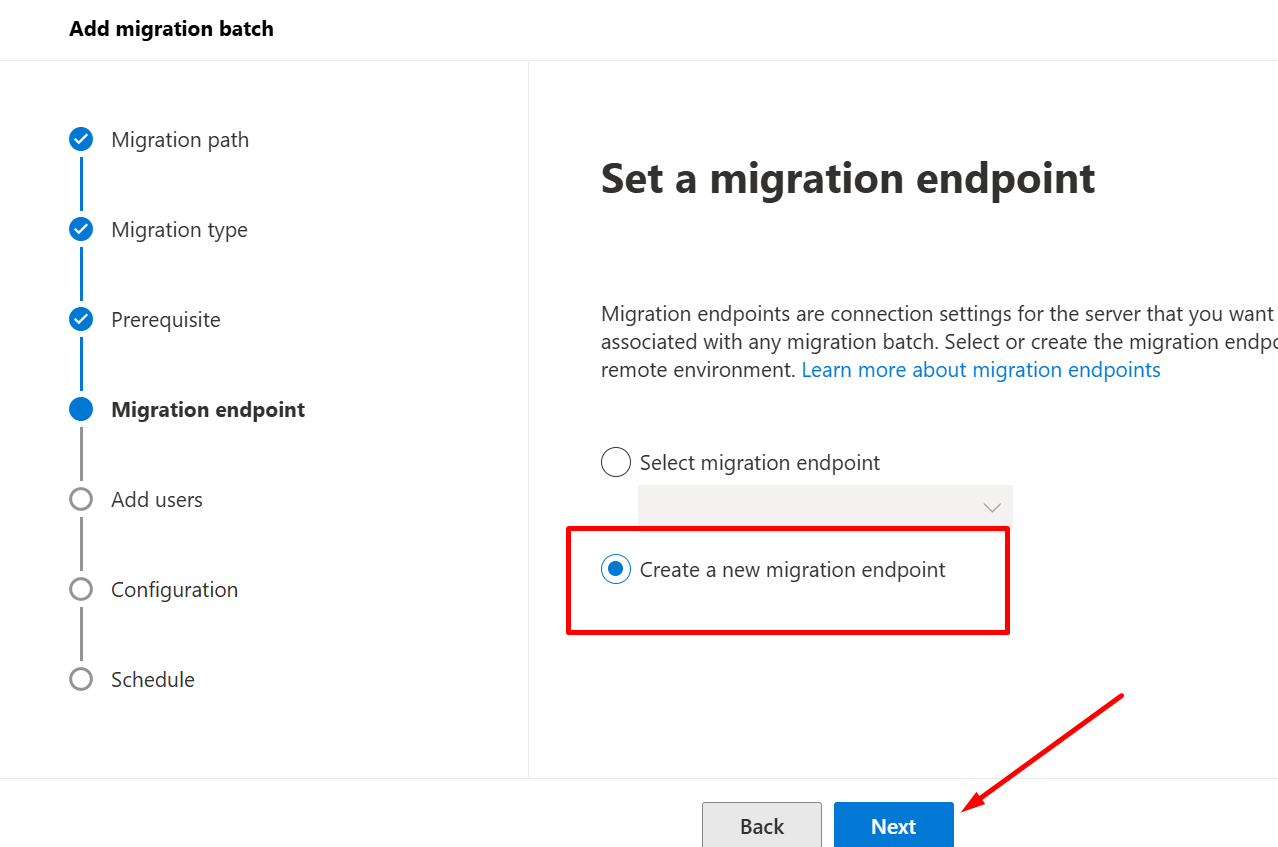
9- Enter the migration name you assigned in Step 6, then click Next.
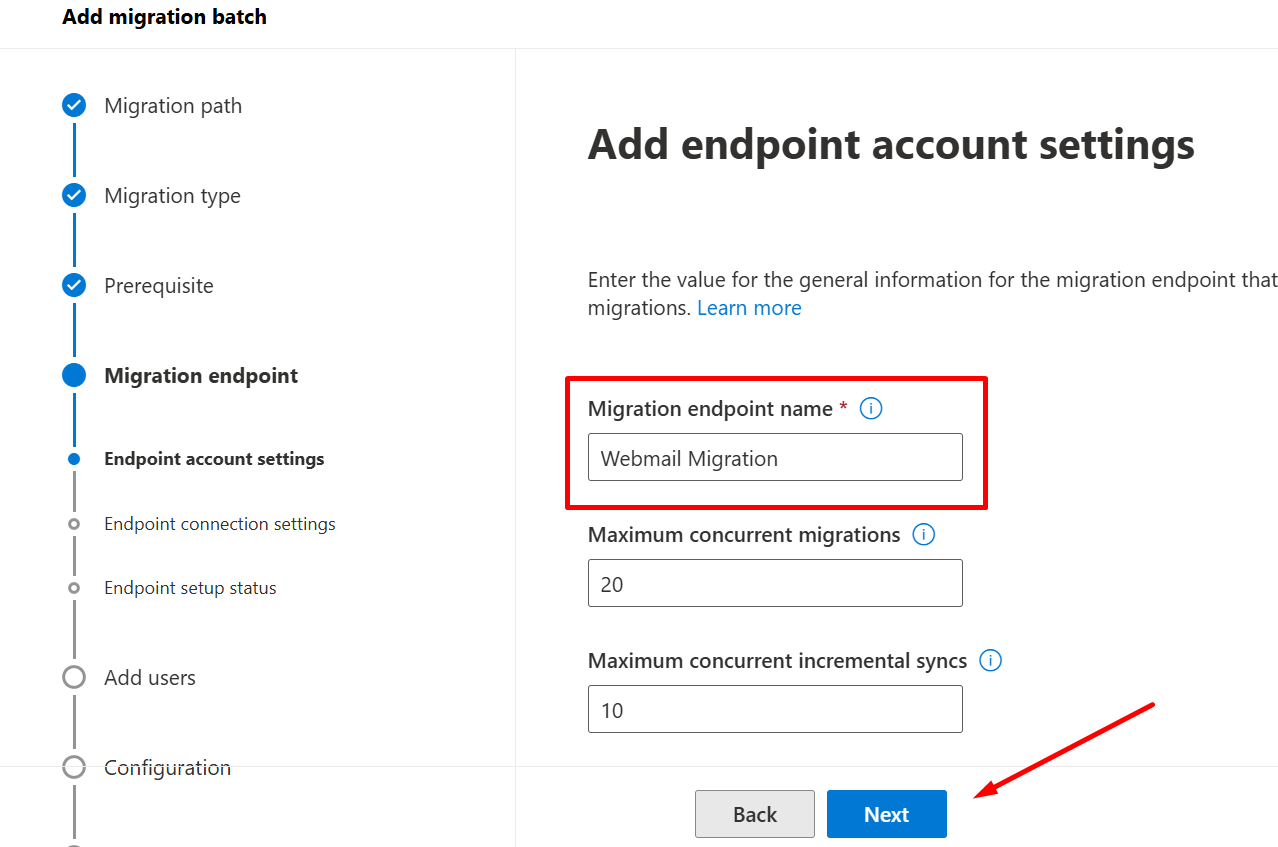
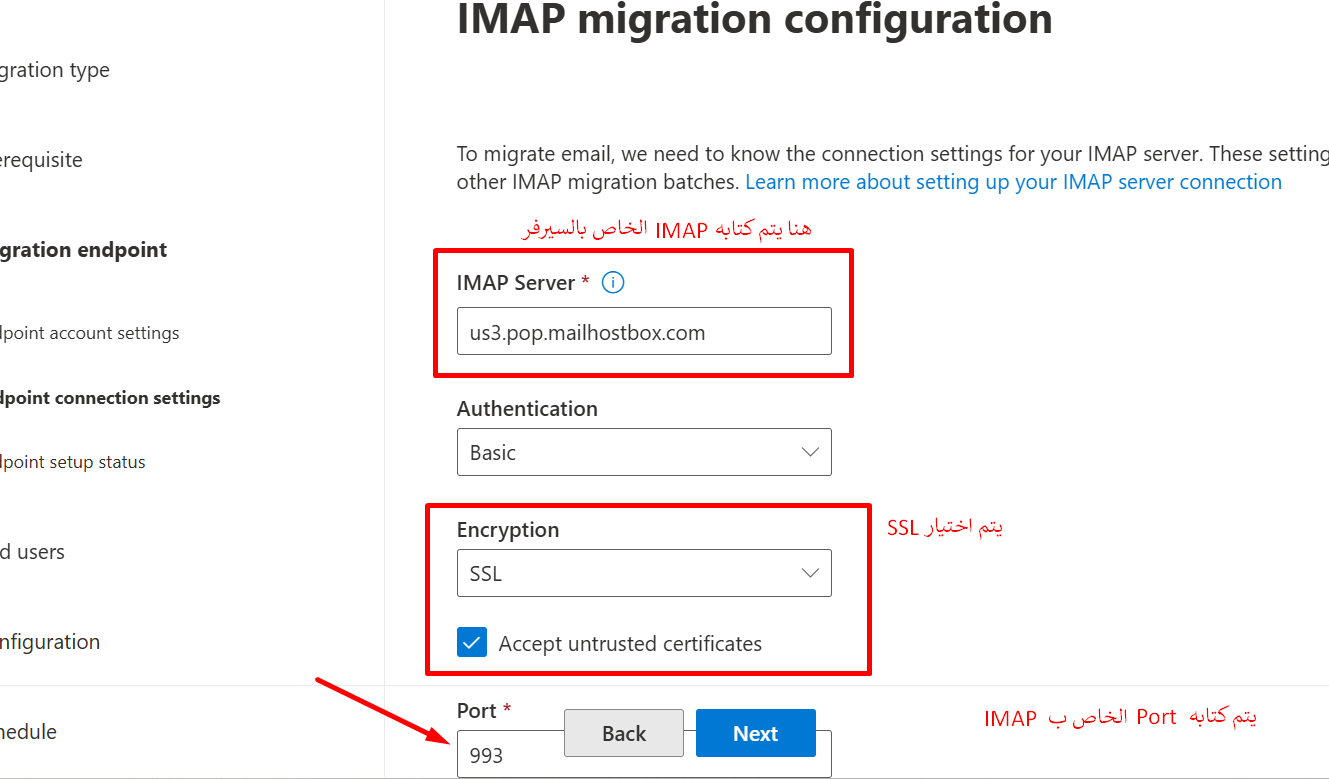
10 - Enter IMAP Server Details:
Provide the following details for the IMAP server:
- IMAP Server Address: The address of the IMAP server.
- Port Number: Enter the port number of the server.
- Select SSL to ensure secure communication.
11 - Create a CSV file containing the following information:
- Email Address: The email address of the server from which data will be migrated.
- Username: The email address to which the data will be migrated.
- Password: The password for the email account from which data will be migrated.
Save the file after entering the details.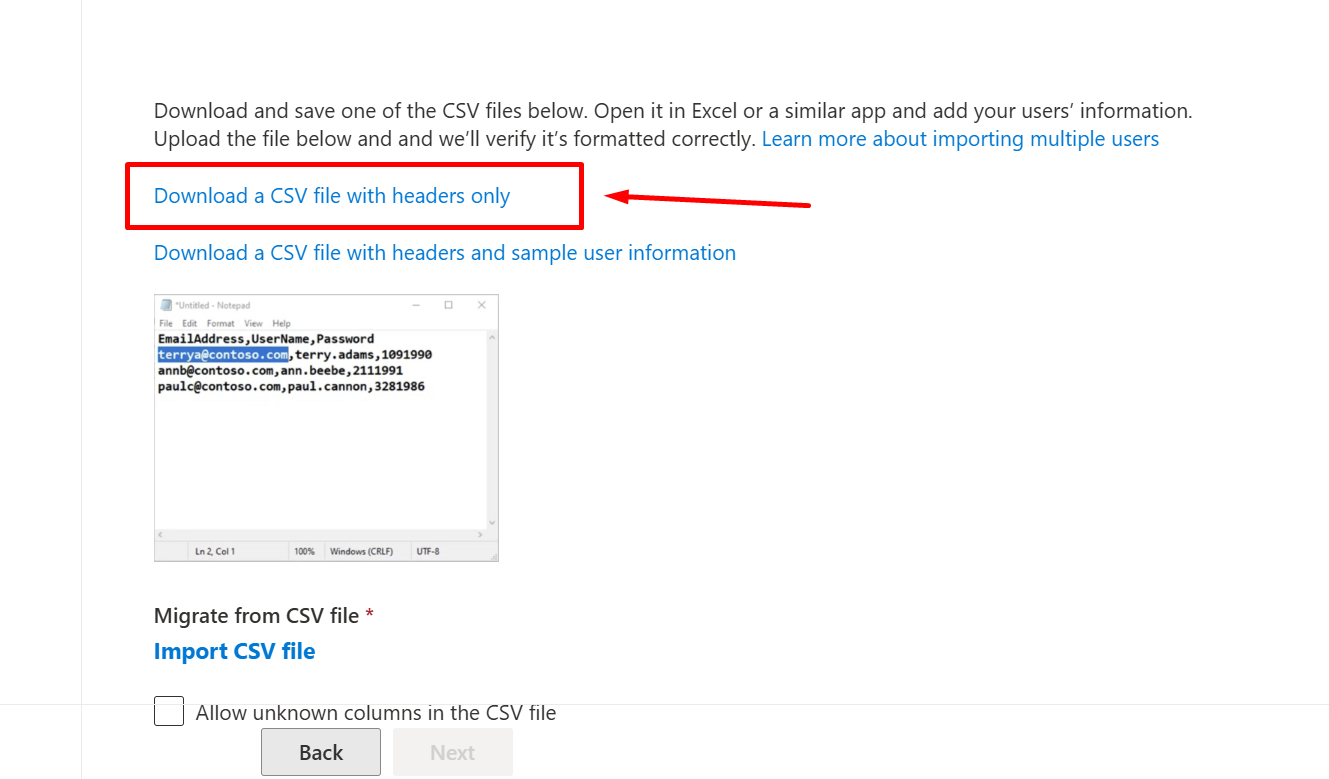
12 - Click Import CSV, upload the saved file, and then click Next.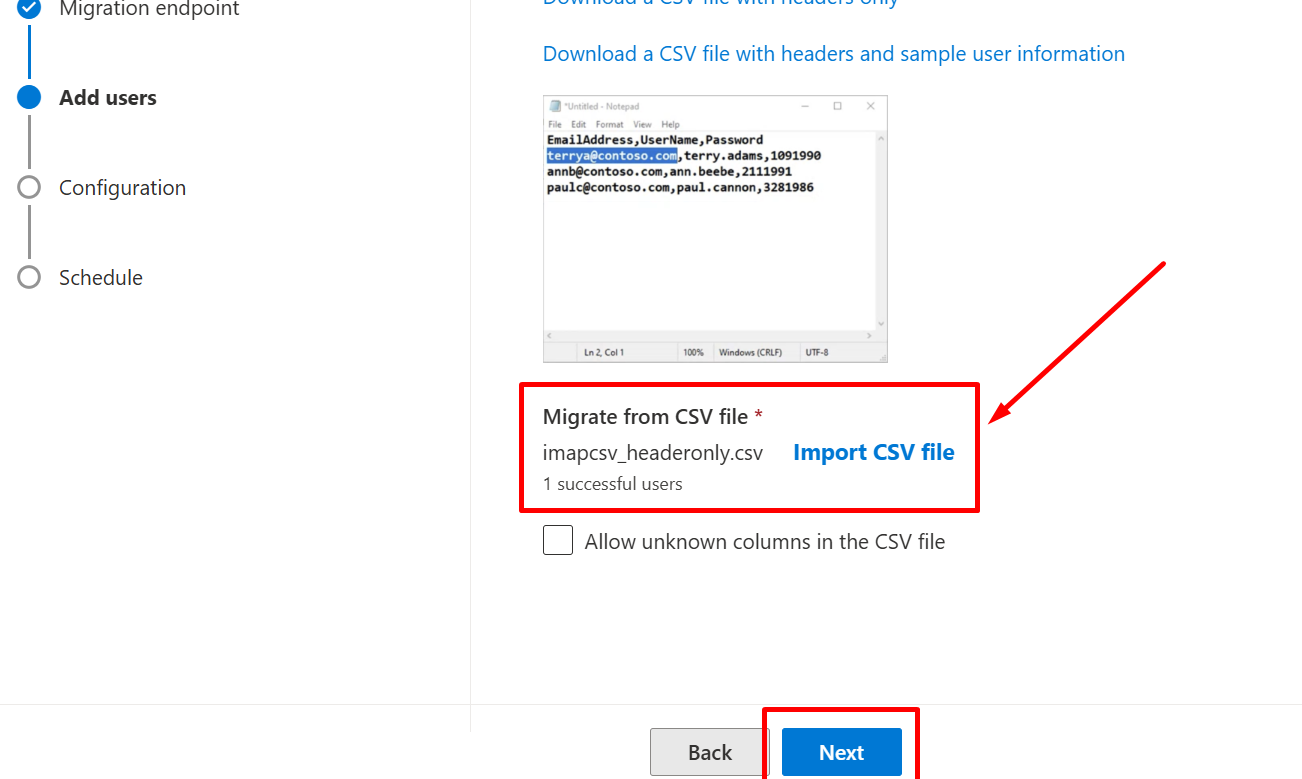
13 - You can choose one of the following options:- Select fa older to be skipped or migrated: Choose folders to include or exclude in the migration.
- Select items by time range to be migrated: Specify a date range for the items to be migrated.
If you want to migrate all files, you can skip these options and click Next.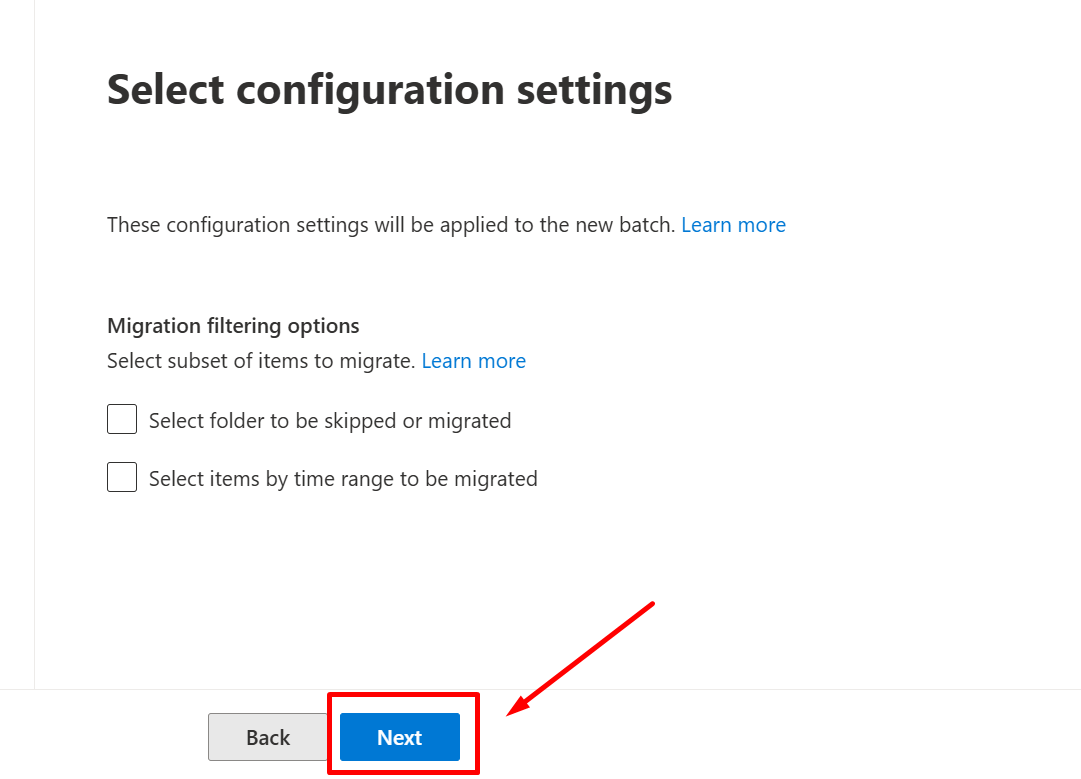
For more details, visit the following link: https://learn.microsoft.com/en-us/exchange/mailbox-migration/migrating-imap-mailboxes/migrate-other-types-of-imap-mailboxes
Additional Notes:
- Ensure the accuracy of the data entered in the CSV file to guarantee a successful migration process.
- If you need further assistance, feel free to contact our technical support team! :)
- Ensure the accuracy of the data entered in the CSV file to guarantee a successful migration process.
- Select fa older to be skipped or migrated: Choose folders to include or exclude in the migration.
- Email Address: The email address of the server from which data will be migrated.


