Step 1: Accessing the Admin Panel:
- After signing in to your Microsoft account, click on the Admin icon or access the admin panel directly via the following link:
https://admin.microsoft.com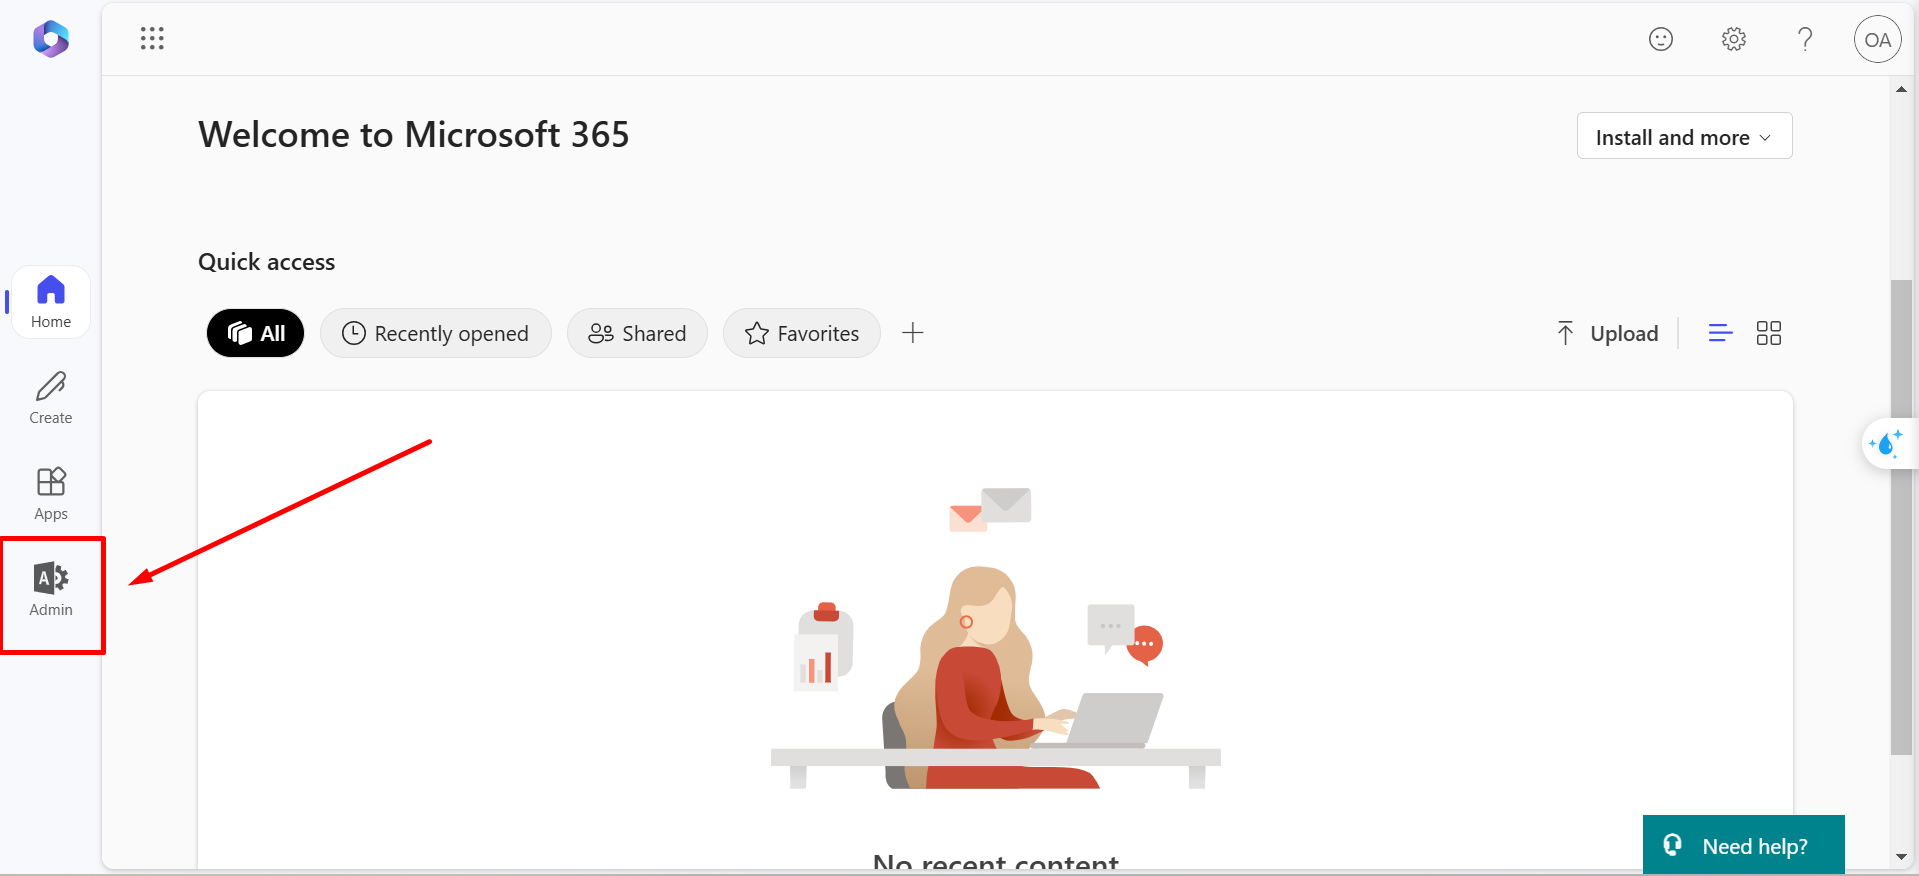
Step 2: Navigate to the Domains Option
From the control panel, search for the Domains section and click on it.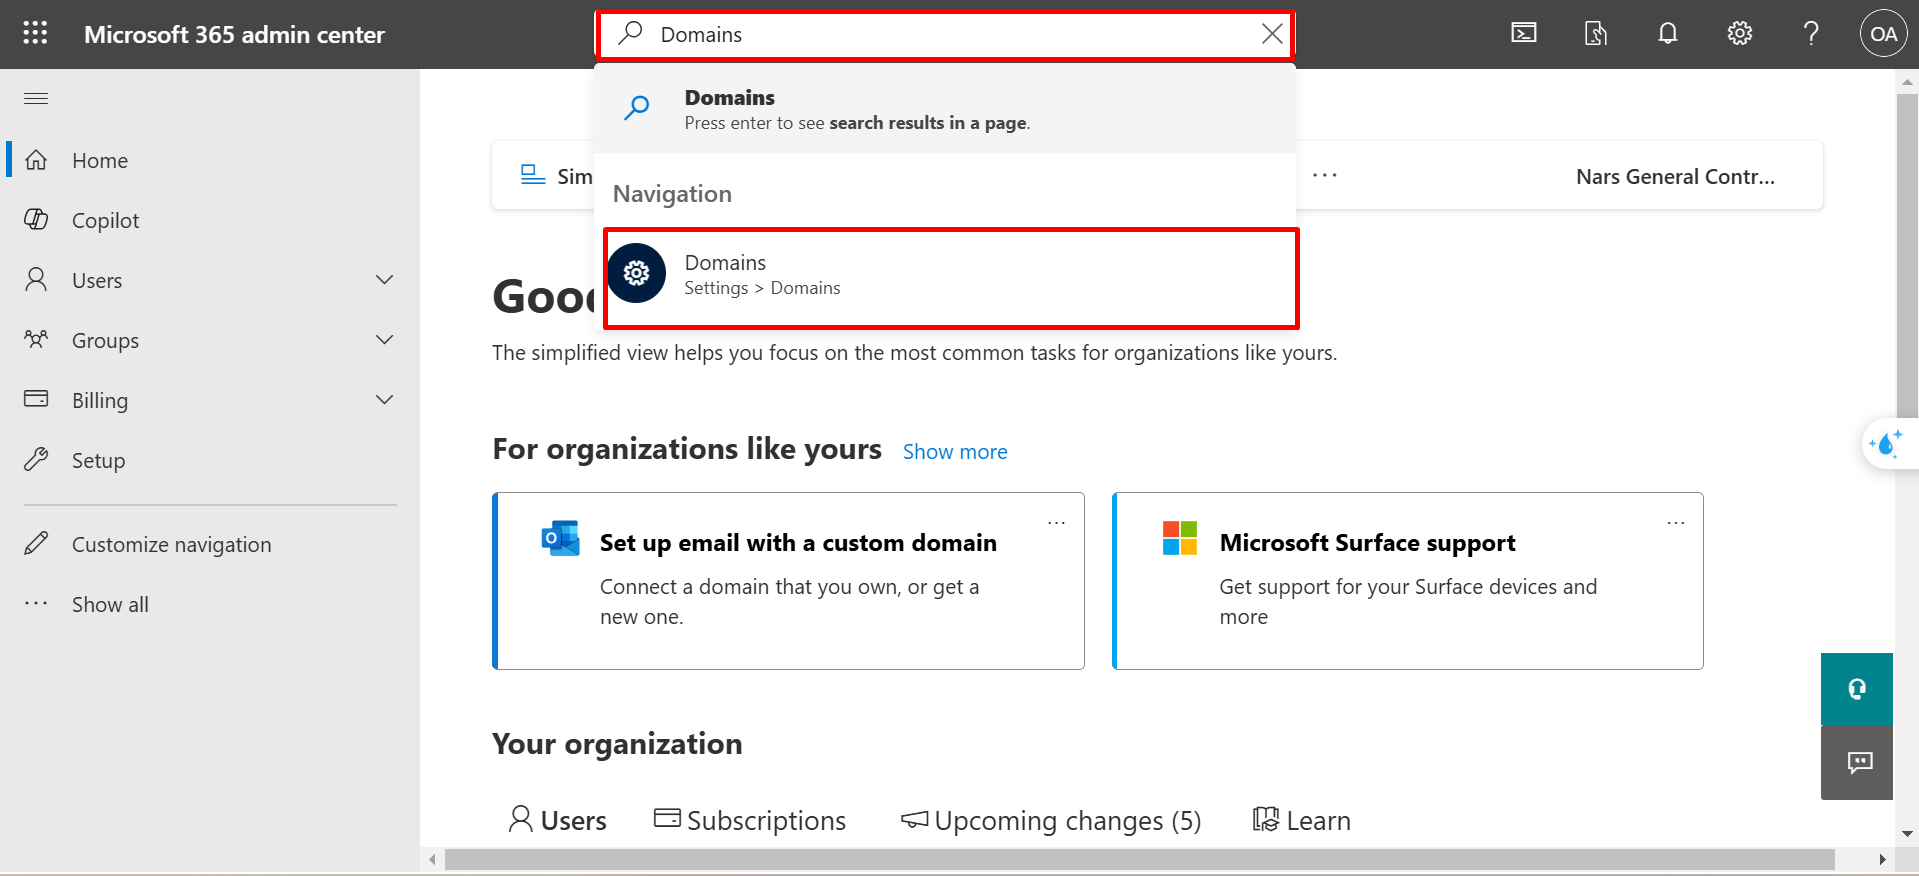
Step 3: Add a New Domain
Click on the Add Domain button to add your organization's domain name.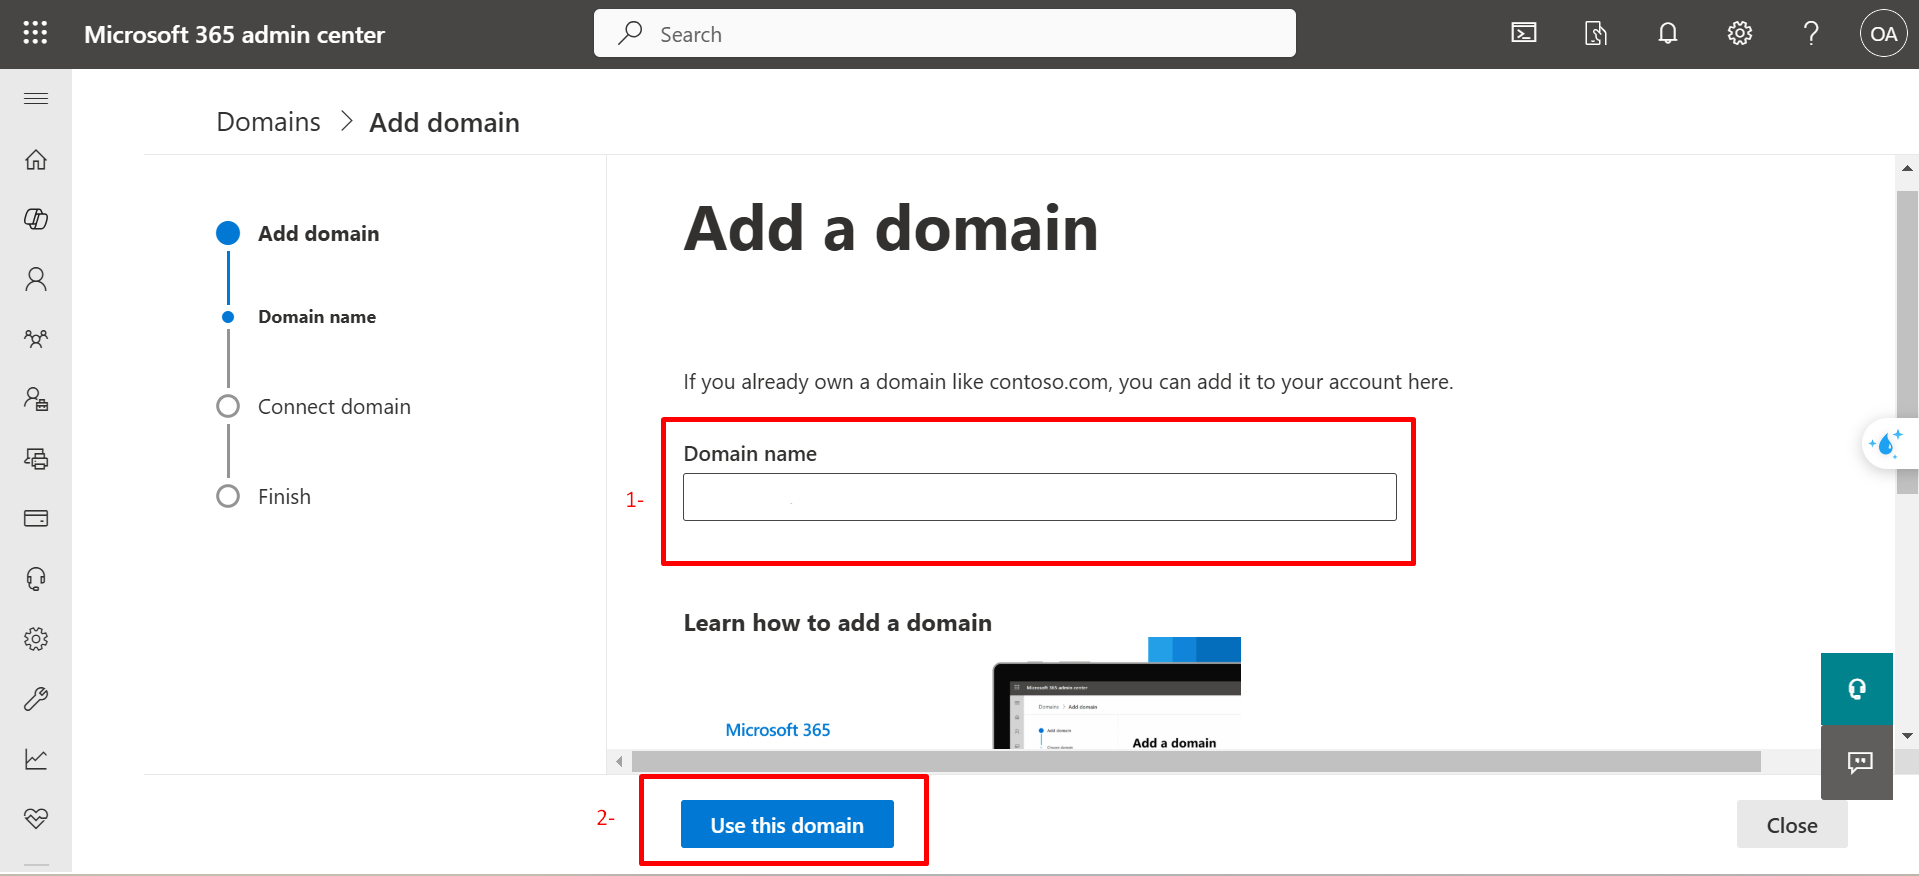
Step 4: Enter the Domain Name
Enter your domain name accurately and ensure it is correct. Then, click on Use this domain to proceed.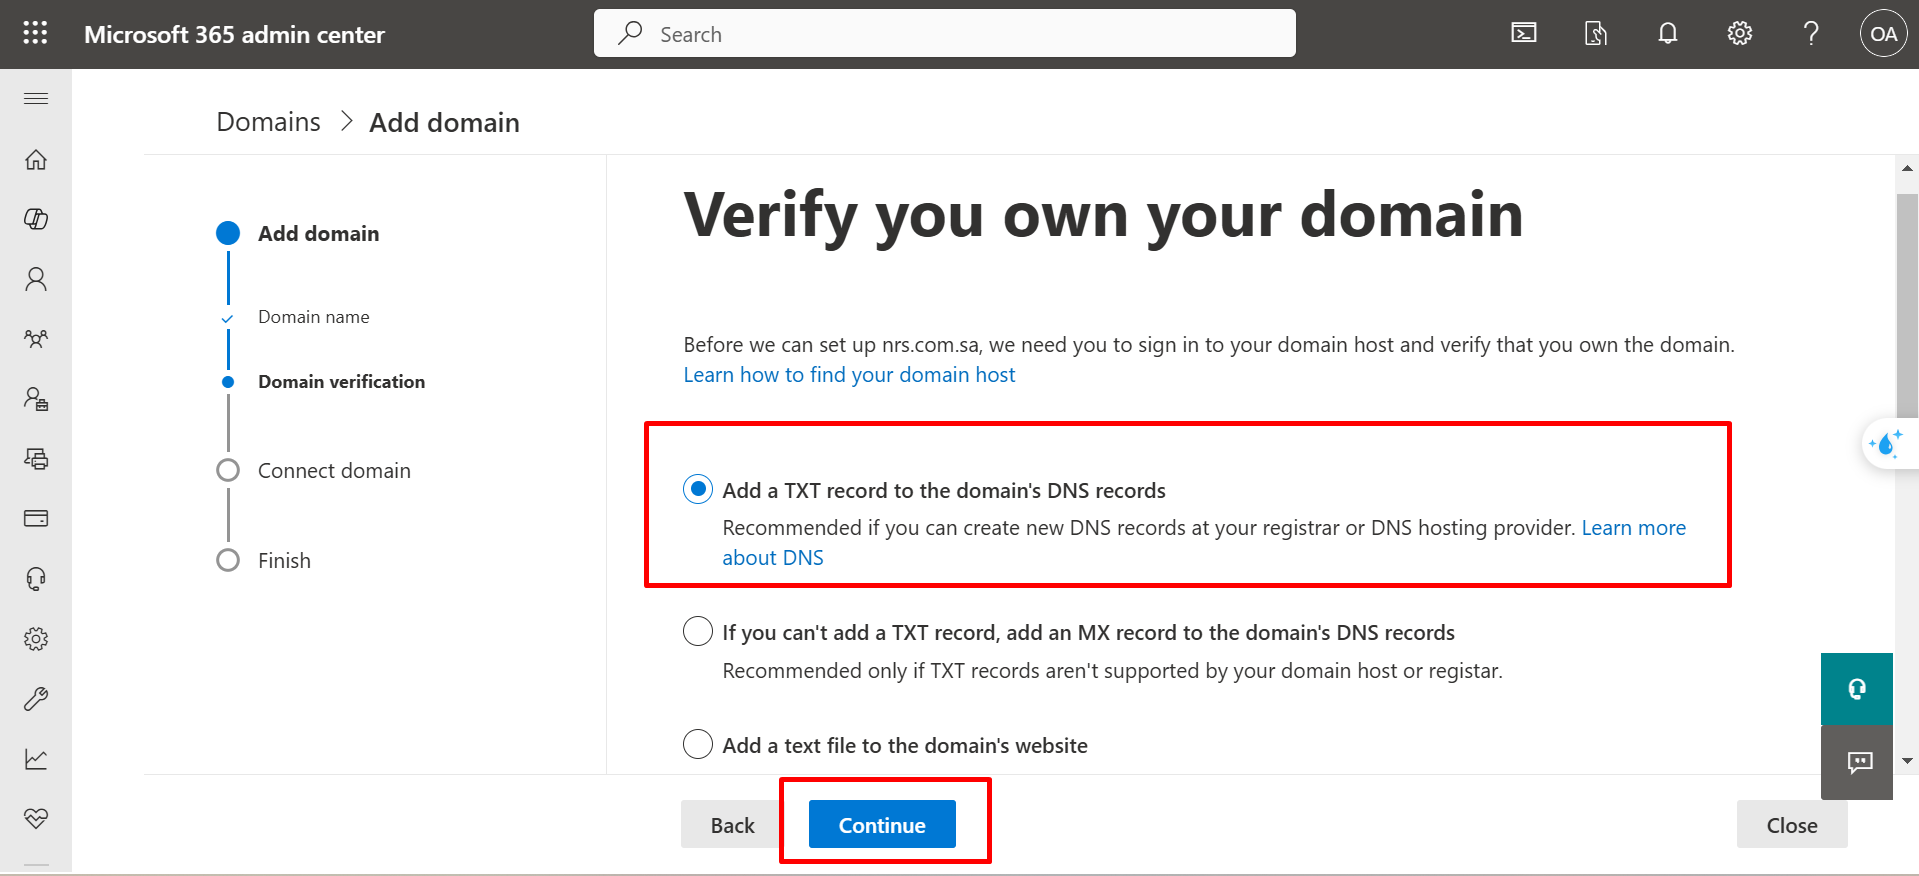
Step 5: Verify Domain Ownership
- You will be prompted to verify ownership of the domain. Choose the verification method that suits you best.
After selecting a verification method, a set of DNS records will be provided. These need to be added to the DNS management section of the domain's hosting provider.
Note:
If you are using our Servers, you can refer to the following guide on adding DNS records:
How to Add DNS Records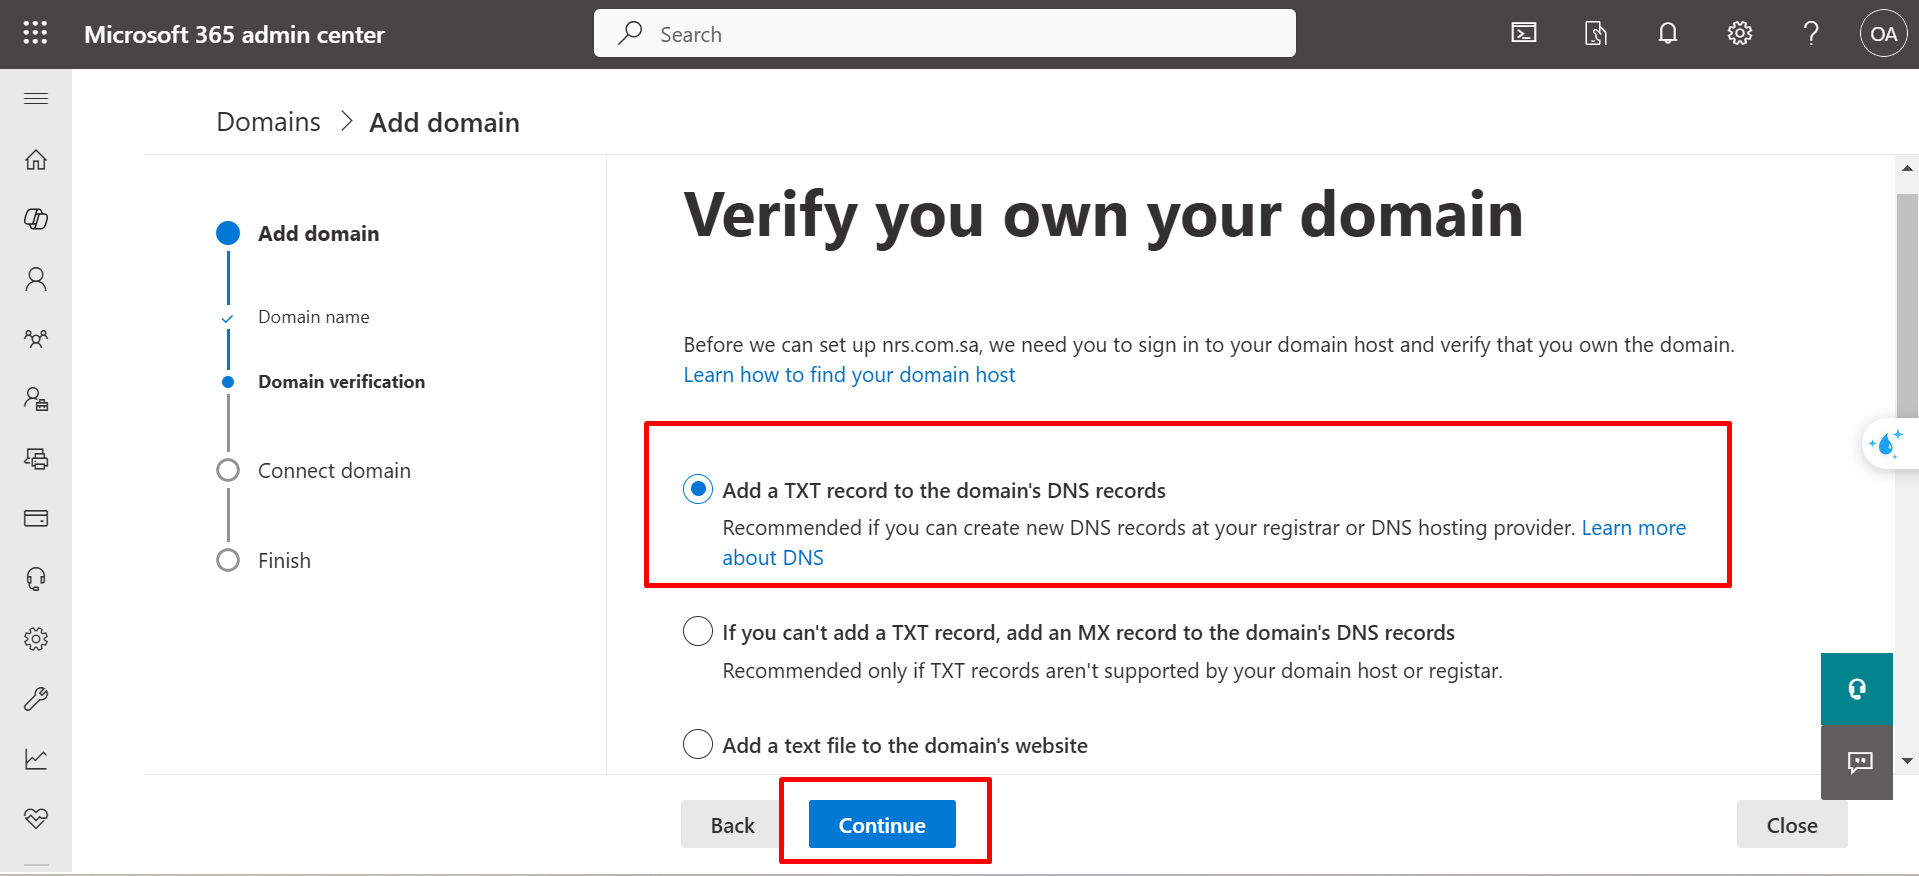
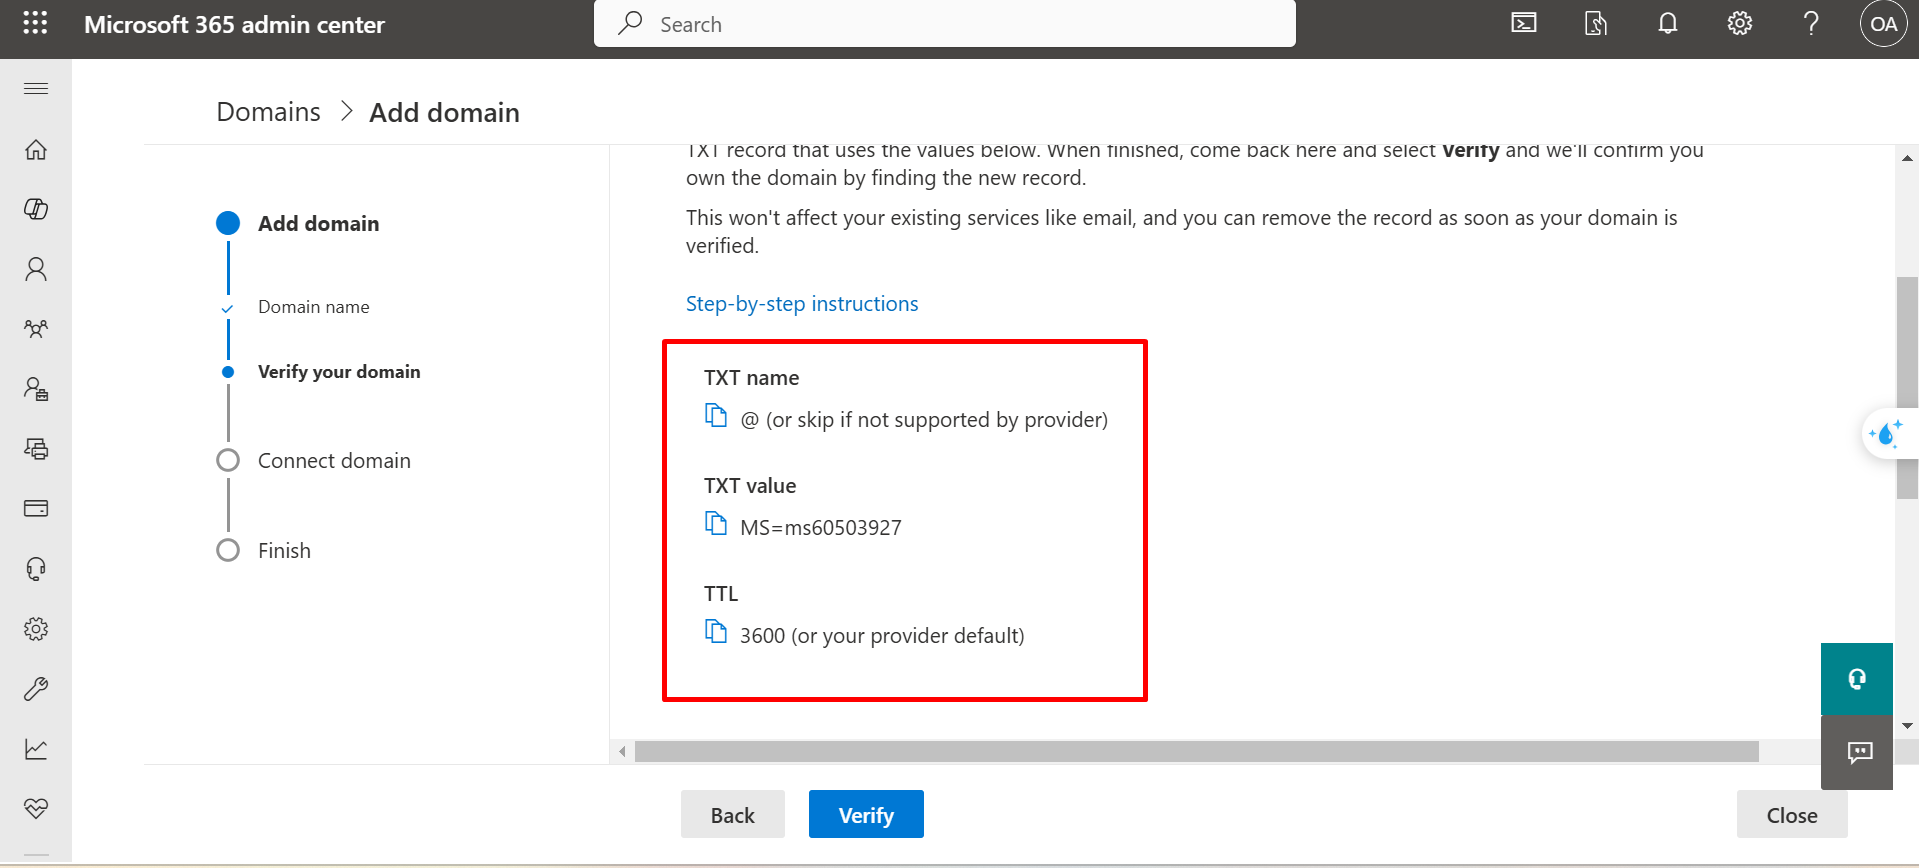
Step 6: Add Verification Records
- Copy the records provided during the verification process and add them to your DNS management as described in the previous step.
Step 7: Configure Email Service Records
-
After completing the verification process, additional records specific to Microsoft services will be displayed, including:
- MX
- CNAME
- TXT
-
Add each of these records to your DNS management.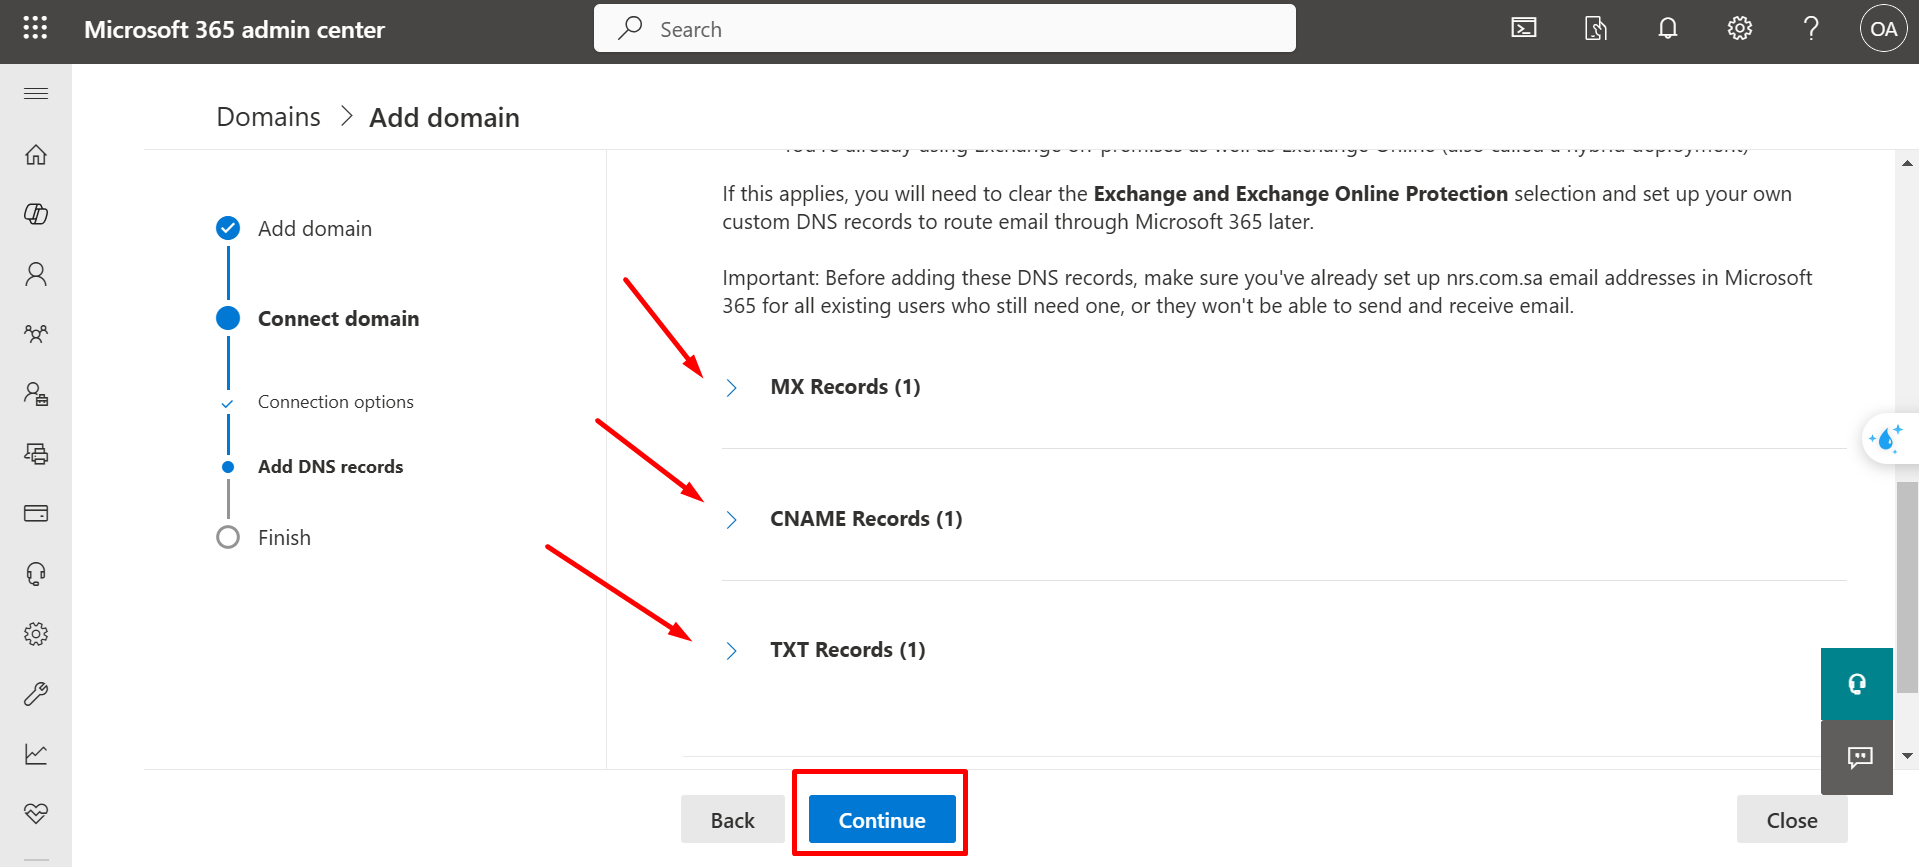
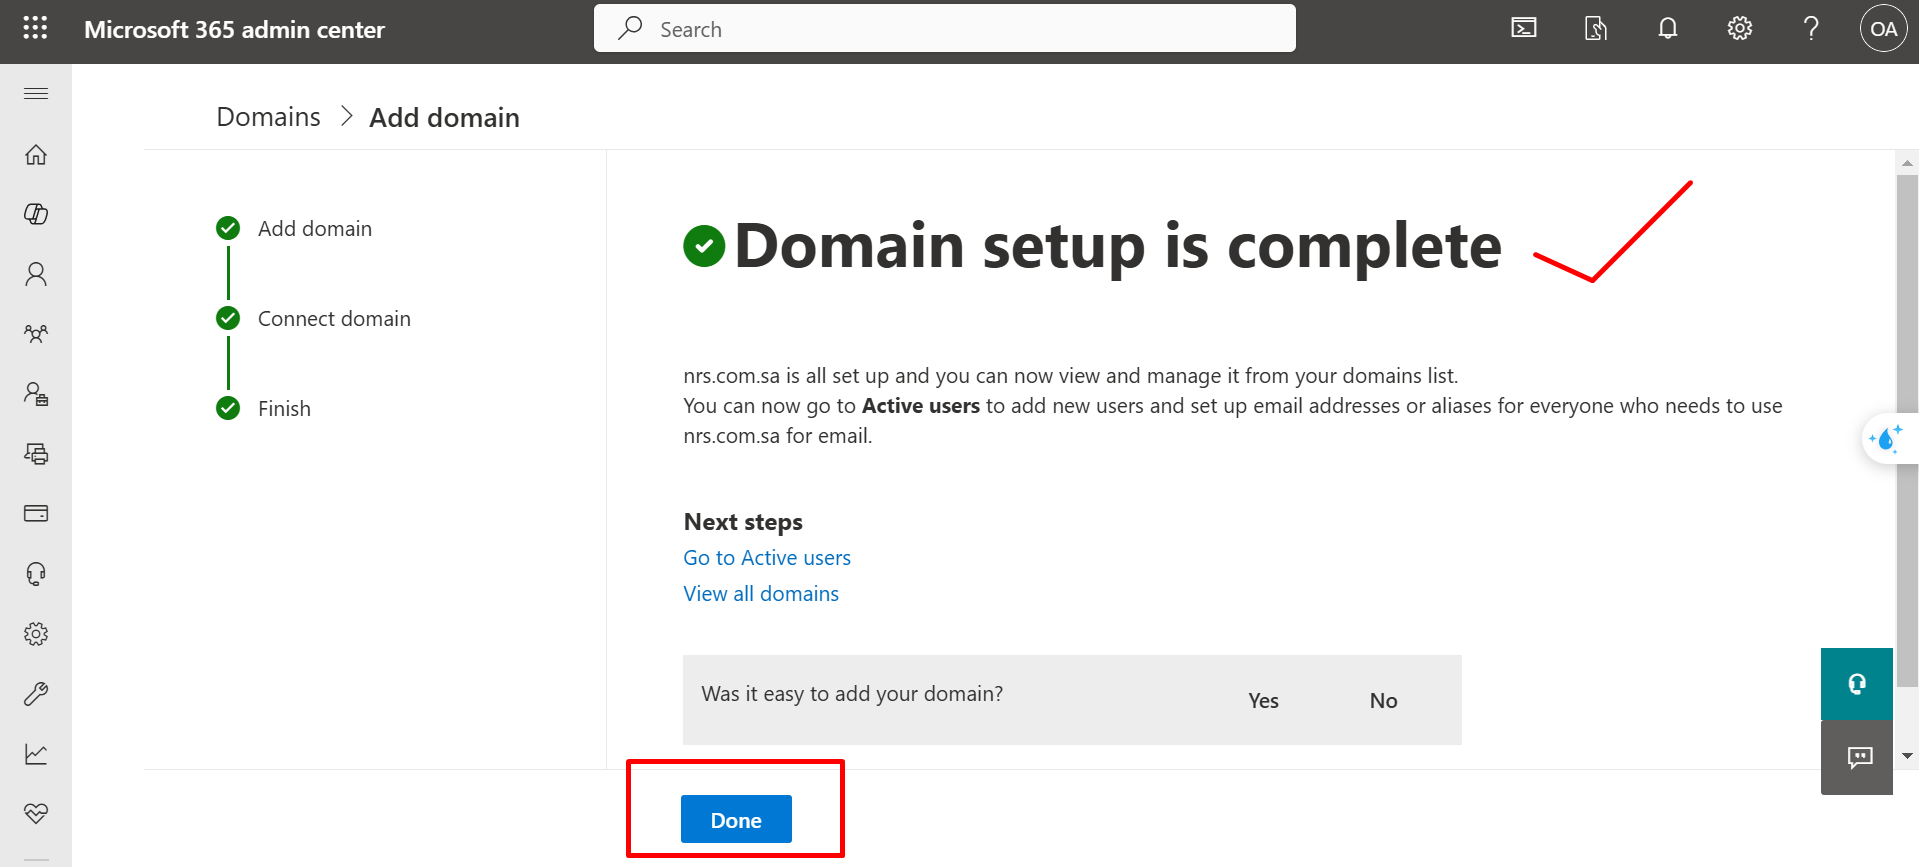
Final Step: Complete the Verification Process
- Once all required records are added and validated, the domain setup will be finalized, and your domain will be successfully linked to the email service.
For More Details About Microsoft 365 Services:
You can visit the following link for comprehensive instructions on adding domains:
Add a Domain to Microsoft 365
If you encounter any issues or have questions, please don’t hesitate to contact our technical support team.


